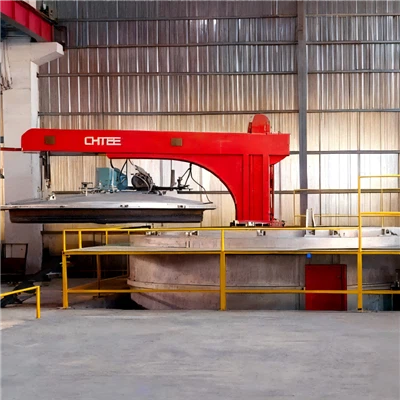
Vacuum furnace quenching is not merely a matter of loading parts into the furnace, heating them up, and letting them cool down.
What is the greatest fear in the heat treatment industry?
It is not the high cost of equipment, but rather the failure of the work itself-manifesting as deformation, cracking, or uneven hardness. A single furnace batch can be worth hundreds of thousands; if just one small detail is overlooked, the entire load could be ruined.
This is particularly true for vacuum quenching. Many business owners assume that simply having a "clean environment and precise temperature control" guarantees success. However, upon unloading the parts-which may appear bright and shiny on the surface-subsequent inspection often reveals insufficient hardness, non-uniform microstructure, or even localized cracking. Where did things go wrong?
In reality, while the vacuum quenching process appears simple-heating → holding → cooling-each step contains potential pitfalls where a moment's inattention can undo all previous efforts.
1. Loading Method: Directly Impacts Quenching Uniformity
Many people, seeking to save time and effort, simply pile a basketful of parts together and push them into the furnace. But have you considered how the airflow will circulate? If cooling is uneven, "shadow zones" will cool down more slowly; consequently, the internal microstructure will not undergo a complete transformation, and the desired hardness will naturally not be achieved.
The Correct Approach:
- Leave sufficient spacing between parts to prevent them from "clustering together";
- Place taller parts in the center and shorter parts toward the periphery to ensure airflow reaches every corner;
- Ensure the holes in the loading trays are arranged logically so they do not obstruct the cooling air channels.
These are not merely matters of fastidiousness; they are essential process requirements.
2. Heating Rate: Avoid the Urge to Rush
In a vacuum environment, there is no convection; heat transfer relies entirely on radiation. If the heating rate is too rapid-particularly with thick-walled parts or high-alloy steels-the surface may reach the target temperature while the interior remains relatively cool. This creates "thermal stress," which makes the parts highly susceptible to cracking during the subsequent quenching stage.
Recommendations:
- For mold steels such as Cr12MoV or H13, or for large workpieces, incorporate an intermediate holding step (e.g., holding at 800°C for 30 minutes) to allow the internal and external temperatures to equalize;
- Ensure adequate preheating and do not skip any heating stages.
A slightly slower pace often results in a safer and more reliable outcome.
3. Quenching and Cooling: The Most Critical Stage-and the Easiest Place to Fail
Most vacuum furnaces utilize high-purity nitrogen or argon gas for pressurized quenching and cooling, typically at a pressure ranging from 0.6 to 2.0 MPa. However, many facilities focus solely on setpoints while neglecting actual results.
Common Issues:
- Insufficient gas purity (containing oxygen or moisture), which compromises cooling rates and surface quality;
- Clogged nozzles or reduced blower efficiency, leading to uneven cooling;
- Lack of staged pressure control-applying high pressure immediately at the start-which can actually result in part deformation.
Practical Tips:
- Regularly monitor the gas dew point to ensure dryness;
- Inspect the condition of blowers and nozzles prior to quenching;
- For complex workpieces, consider a "staged pressurization" approach: begin with low-pressure pre-cooling, then increase the pressure to complete the phase transformation.
4. Timing of Removal: Don't Wait Too Long
Once the furnace shuts down, many operators are in no rush to retrieve the parts, assuming that "letting them soak a bit longer won't hurt." However, vacuum furnaces possess excellent thermal insulation; parts left inside cool down very slowly and may drift past the optimal temperature range for subsequent tempering, thereby compromising the effectiveness of the tempering process.
A more serious consequence is that certain martensitic structures, when held in the low-temperature zone for too long, become susceptible to cracking.
Recommendation:
Transfer the parts to the tempering furnace as soon as quenching is complete; do not let them simply "sit idle" inside the vacuum furnace.
5. Process Validation Is Non-Negotiable
Do not assume that simply setting the parameters provides a permanent, foolproof solution. Variations in material batches, changes in furnace load volume, and even seasonal fluctuations in humidity can all impact the final outcome.
For every new product batch or new process, the following validations are mandatory:
- Hardness testing;
- Metallographic analysis;
- Measurement of deformation/distortion;
- Residual stress testing (where necessary).
Let the data speak for itself-that is the only truly reliable approach.
One final note: While vacuum furnaces offer distinct advantages-such as a clean environment, minimal oxidation, and reduced deformation-they will not automatically "correct your mistakes."
No matter how sophisticated the equipment, it ultimately relies on human operators to utilize it correctly.
If you are manufacturing high-demand products-such as molds, aerospace components, or precision cutting tools-where every detail of the quenching process matters, please contact us immediately.